Tag: beekeeping

  • Losing a Queen

    Honeybees are prone to swarming.  A swarm is a big cloud of bees that have left the hive looking for a new home.  This is a natural part of their reproductive behavior, however in a back yard environment designed to maximize honey output, swarms pose a problem.

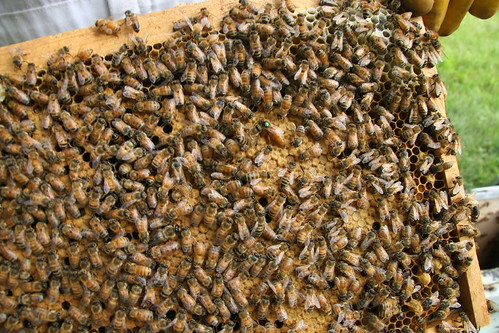
    A couple weeks ago Robbie opened up both hives and noticed that in one there was no sign of a laying queen.  Where there should have been cells filled with larvae at different stages of development there were instead empty cells.  This indicates that either the queen died, or she took off with a swarm.
    frame with no brood

    In this next photo you can see the slightly larger drone cells (where the male bees are hatched) and the very large queen cells that are perpendicular to the rest of the comb.  This frame is in bad shape, and all signs indicate that bees had switched to reproductive mode.
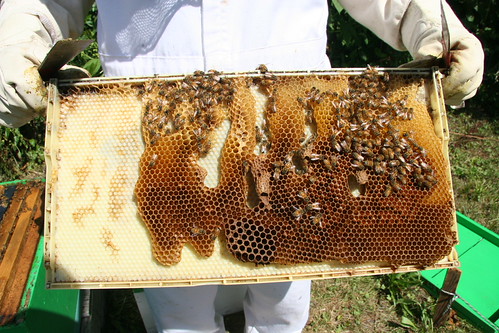
    messed up comb

    Without a queen constantly hatching new workers, the hive would simply work itself to death and that would be the end of things.  There were however many thousands of worker bees left in the hive, busy collecting what was left of the summer nectar flow.  The solution to losing a queen is to simply get a new one.  So Robbie contacted local bee expert, David, at Long Lane Honey Bee Farms and went to pick up a new queen.  The new queen only cost about $20, and would save us the trouble of starting a new hive in the spring.
    queen in a carrierYou can see her long abdomen through the screen with the little green dot to make her easy to spot.  The little cage that she came is designed to help her assimilate with the bees already in the hive.  Her potent pheromones waft through the screen controlling the army of workers.  The bees then chew their way through a sugar plug (black tube thing) and release her into the hive.  The delay while they work to set her free insures that she won’t just fly away once released.
    Re-queening the hive

    Robbie installed the queen cage between the two big boxes, right in the middle of the brood chamber.  In a week or two we’ll open the hive back up and see if there’s any signs of egg laying.  Until then, fingers crossed.

    You’ll notice how the hive on the left is much taller.  When Robbie noticed the absence of a queen, he moved the top honey super over. He placed newspaper between to act as a temporary barrier while the bees in there got used to their new master.  Oh the intrigue of beekeeping…

  • hygienic bee-havior for more natural bees

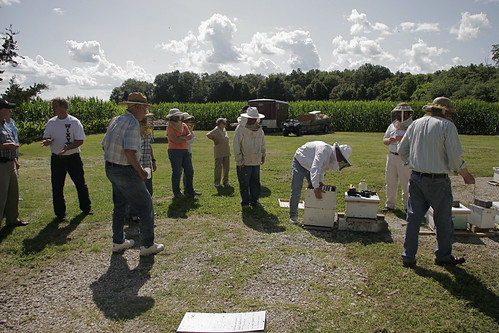
    Robby-Bob and I went to another bee club meeting on Sunday.  It was a special event for the club.  An expert was there to discuss and demonstrate ways to test bees for hygienic behavior.
    introducing the demonstration
    The reason this is important is because beekeepers routinely use chemicals to fight off infections and pests, usually to save themselves from economic ruin.  To reduce the amount of chemicals beekeepers use, an effort is underway to selectively breed bees that resist the pests.  One way for bees to protect themselves is to identify and remove cells in the hive that are infected.  Bees that demonstrate hygienic behavior are those that remove larvae from damaged cells.  To test for this trait, they selectively freeze/kill a section of larvae with liquid nitrogen and watch to see if the dead larvae are removed by the workers.
    demonstration- freeze kill with liquid nitrogen
    A steel can is smushed into the comb, and liquid nitrogen is poured inside to instantly kill the larvae inside.  After 24 hours, the frames are inspected.

    bees without hygienic behavior bees with hygienic behavior
    The frame on the LEFT is from a hive that does NOT show hygienic behavior. In the frame on the RIGHT, notice how the bees removed the larvae from all the cells leaving a circle of empty comb, a sign of hygienic behavior.

    Many people have heard of Colony Collapse Disorder, but bees are susceptible to a range of problems and so most beekeepers rely on some sort of chemical strategy to maintain their business.  Breeding hygienic bees may ultimately lead to an industry less dependent on chemical inputs, meaning more ‘natural’, or ‘organic’ honey and wax (yay!).  Of course I am oversimplifying this whole process.  Hygienic behavior is actually much more complicated, especially when you approach it from the genetic side.
    queen removal
    I was very lucky to be invited to the club meeting and demonstration, thanks Robby!

    I posted more photos of the meeting to this flickr set.

    Also CEIBA wrote about the event (and used my photos!) on their website.

  • Hives get taller

    Head-beekeeper, Robby-Bob, came by yesterday and added a shallow super to both hives.
    The gives are getting taller

    Based on the progress that was observed in the last bee post, the hives were past due for some extra expansion room.  It took a little while to source the correct size frames for the shallower top boxes, and Robby installed them while I was in class.  Ideally the bees will use the new frames mostly for honey that we can later harvest.  Robby decided not to use a queen excluder, so there’s the potential that the queen will get up there and lay eggs.  We have enough supplies for one more box on each hive depending on how well they take to the new frames.

  • Hive Tour 7/12/09

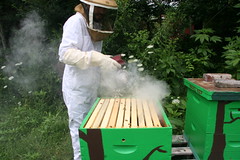
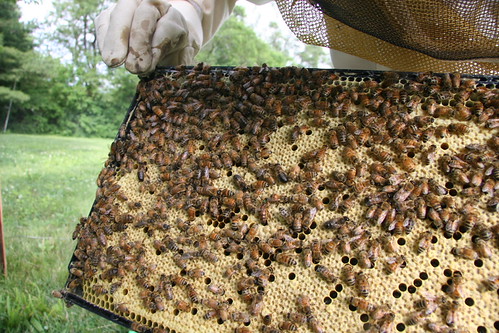
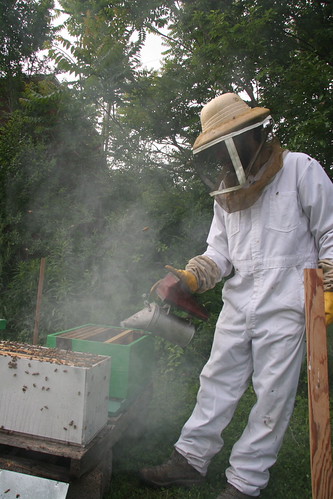
    smoking the beesMy good friends Kannan, and Mac helped me get a closer look inside out hives yesterday.  Four weeks ago I put the second deep supers on each hive.  The supers were full of bare frames, meaning the bees needed to build the comb before they could use them.  Well, after checking out the hives I can say they are doing excellently.  Lots of brood and some full frames of honey.  There were even empty brood chambers where baby bees had already emerged.  This means we probably need to add more space to allow the hive to continue to grow.

    The diagram on the left is similar to our hives, (different lid and different number of frames) but it gives you an idea of how the hives are constructed.  Its a fairly simple design.  Wooden frames are suspended inside a box, and the boxes are stacked up.  The bees then build honeycomb on both sides of each frame.  I had some handy helpers, so we were able to take clean photos of each frame.  I cropped all the photos in a similar way so you can flip through each cross section of the hive.  As you get towards the middle you’ll notice that there is less honey and more brood.  The queen lays eggs in a somewhat predictable pattern, and experienced beekeepers use that to judge the quality of the hive.

    Vodpod videos no longer available.

    full screen slide show of hive 1

    Vodpod videos no longer available.

    full screen slideshow of hive 2

  • Honeybees arrive

    We installed two hives of honeybees today at La Casa.  Fellow co-oper, Robby from across town will be using our yard (and pollen) to raise honeybees.  Robby got his hive boxes from his grandfather who was a beekeeper.  Robby’s been taking classes from the Central Illinois Beekeeper’s Association: CEIBA.  Last night we picked up the bees from a queen breeder near Danville.  They were sealed in boxes for transport in the van.

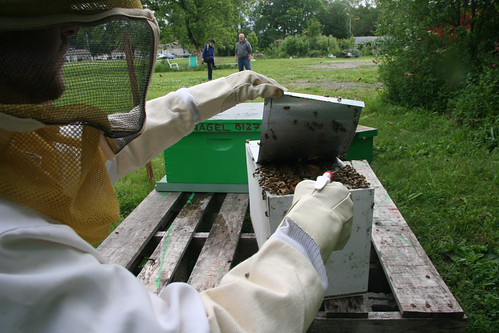
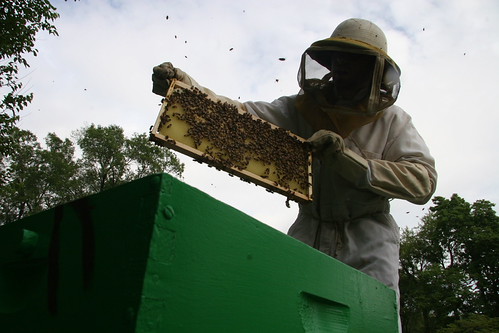
    About 10,000 bees came with each queen.  Five frames from a two healthy colonies, along with a two queens were put into boxes.  Today we tranported the frames into the hives.  Robby moved the first colony, and I moved the second.  We had to wear full bee suits otherwise the bees would have stung us many times.  It was quite a rush carrying the frames full of bees and being careful not to disturb them too much.  We took a bunch of photos, and I’m just going to go ahead and post most of them.
    opening up the transport boxes
    Robby tried to calm the bees down with sugar water. There were hundreds flying around us as we were working.
    sugar water
    frame in the hive
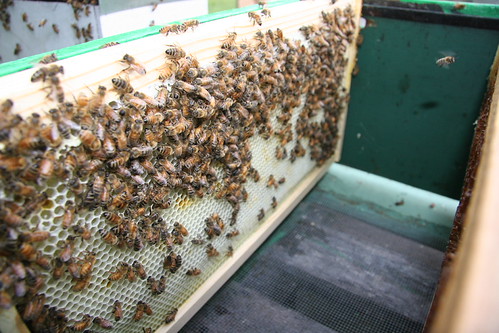
    This is what frames look like installed in the hive. There are ten frames in each section of the hive. We mixed the five frames full of honey and brood (developing bees) in with 5 clean frames.
    moving the frames over
    most of the frames in now
    Most of the frames are installed. Just a few more to squeeze in.
    Queen bee spotted (green dot)
    You can see the queen crawling around in this photo. There’s a little green dot on her back. Try this hi-res version if you want to see her up close. She has a longer body and smaller wings.
    smoking the second hive
    I suited up and moved the second set of frames while Robby took photos. This time we tried the smoker instead of sugar water. The smoke calms them down and confuses their communication.
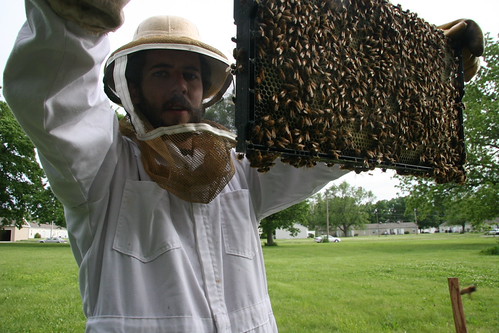
    holding up a frame full of bees
    Robby snapped this nice photo.
    more smoke to calm them down
    Calming them with more smoke. Only two frames left to move.
    Queen bee 2 (green dot)
    The other queen. Look for the green dot. Hi-res.
    bee work done, hives ready
    All put back together. Bees installed. The next move is to put more boxes with clean frames on top. The hives are designed to be modular, building up from the bottom box. Two big boxes at the base are where the queen builds up her colony. Then at some point smaller boxes are placed on top with a screen that lets only the workers past. Since only the worker can access the top boxes, no eggs are laid and they become full of honey. Since we’re starting this hive pretty late in the season, we might not get much honey this year. But its still a worthwhile project and if the hives survive the winter, we’ll have plenty of honey next year.