We canned a lot of things this past wednesday.
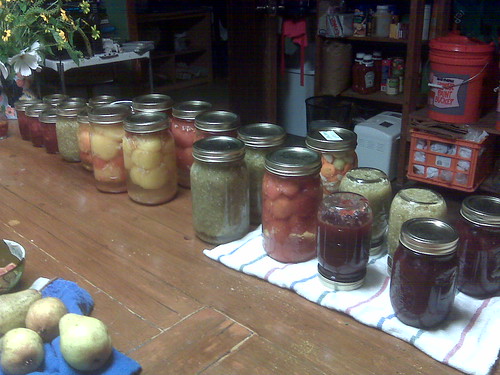
Maybe Carly can update this post with some more info!
We canned a lot of things this past wednesday.
Maybe Carly can update this post with some more info!
This past Friday we went mushroom hunting in a super-secret local spot. The key to finding mushrooms is going out a day or two after it rains. The soaked ground underneath decaying trees creates the perfect conditions for fungal growth.

In addition to a dozen or so species of fungi, we’re %90 certain we found some chanterelles, a choice edible. We cooked and tasted ’em (I didn’t try too much) and they were indeed delicious. I made a spore print, but the white spores were difficult to see on the white piece of paper that I used.

Mushrooms are so beautiful and interesting.
 Link to the rest of my mushroom photos on flickr.
Honeybees are prone to swarming. A swarm is a big cloud of bees that have left the hive looking for a new home. This is a natural part of their reproductive behavior, however in a back yard environment designed to maximize honey output, swarms pose a problem.
A couple weeks ago Robbie opened up both hives and noticed that in one there was no sign of a laying queen. Where there should have been cells filled with larvae at different stages of development there were instead empty cells. This indicates that either the queen died, or she took off with a swarm.

In this next photo you can see the slightly larger drone cells (where the male bees are hatched) and the very large queen cells that are perpendicular to the rest of the comb. This frame is in bad shape, and all signs indicate that bees had switched to reproductive mode.
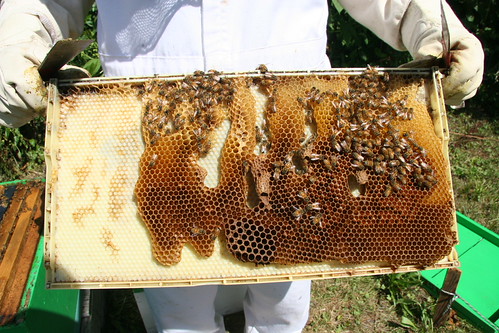
Without a queen constantly hatching new workers, the hive would simply work itself to death and that would be the end of things. There were however many thousands of worker bees left in the hive, busy collecting what was left of the summer nectar flow. The solution to losing a queen is to simply get a new one. So Robbie contacted local bee expert, David, at Long Lane Honey Bee Farms and went to pick up a new queen. The new queen only cost about $20, and would save us the trouble of starting a new hive in the spring.
 You can see her long abdomen through the screen with the little green dot to make her easy to spot. The little cage that she came is designed to help her assimilate with the bees already in the hive. Her potent pheromones waft through the screen controlling the army of workers. The bees then chew their way through a sugar plug (black tube thing) and release her into the hive. The delay while they work to set her free insures that she won’t just fly away once released.

Robbie installed the queen cage between the two big boxes, right in the middle of the brood chamber. In a week or two we’ll open the hive back up and see if there’s any signs of egg laying. Until then, fingers crossed.
You’ll notice how the hive on the left is much taller. When Robbie noticed the absence of a queen, he moved the top honey super over. He placed newspaper between to act as a temporary barrier while the bees in there got used to their new master. Oh the intrigue of beekeeping…
Below is the mural from about a month ago. The mural is a project by local artist Chris Hampson.


Chris decided to divide the mural into “picture frames” for people to fill in. (2 weeks ago)


There was painting party which I was unfortunately out of town for. Below is the mural after the party.


It seems that the mural is an evolving collaborative project that is meant to engage as many people as possible. Today I found this excellent panoramic photo-stitch of the mural on Daniel Schreiber’s blog about local art happenings (and chocolate). Super cool.
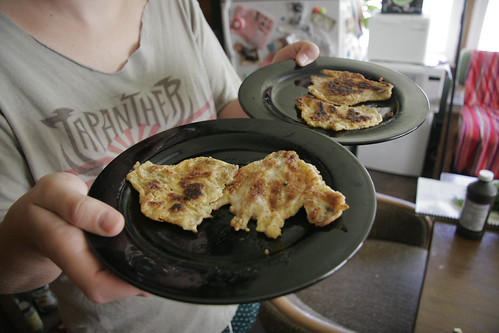
Carly made some tasty fried pumpkin blossoms and I watched and took photos.

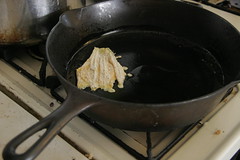
Cut the bottoms off the blossoms so you’re left with only the petals. Dip them in some beaten eggs mixed with milk (or soymilk). Then rub some bread crumbs and flour on them. Oil up a pan and throw em in. Let them fry until each side is getting a little golden. Then serve ’em to your hungry housemates.
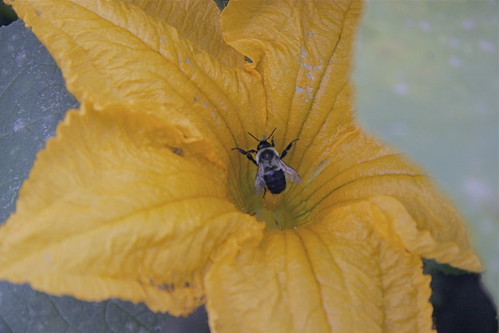
Here’s what the blossoms look like with a bee chilling in there.
I recently attended a hot composting workshop in our neighborhood put on by a local artist who has been doing a lot of organizing this summer in preparation for a community dinner this weekend. Inspired to put into action the knowledge that was generously shared with me, I woke up this morning and decided to build a hot compost pile. We had all the necessary ingredients and tools already on hand, so I was able to get right to work.
 First I went through the garden pulling out lots of weeds. The weeds would be the nitrogen rich materials needed for the pile. We have lots of weeds growing, so there was indeed an abundance. Thse plants bring nutrients up from deep below the soil, so in a way, the weeds are helping!
 I had already cleaned out the chicken coop bedding which contained straw (carbon) and manure (more nitrogen). The next step was to shred the weeds with a lawnmower. This increases the surface area of the materials and speeds up the reaction. We got the mower for free from a friend, woohoo!
The last step was to build the pile. The goal is to create a mass 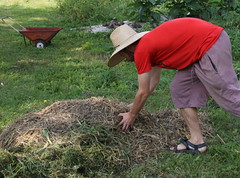 of alternating carbon and nitrogen layers. In between the layers you add water and some dirt or old compost (this primes the pile with all the needed microbes). That’s it: carbon, nitrogen, dirt, water, over and over, until you have a pile that’s about 3 x 3 x 3 feet. The finished pile didn’t make it quite tall enough, so I’m keeping my fingers crossed. I finished off the pile with a ring of chicken wire.
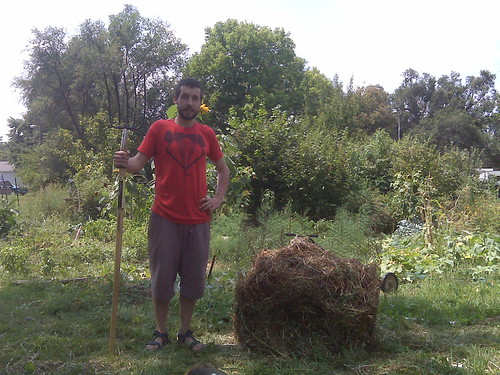
Thanks Gretchen for taking the photos!
A few weekends ago, the members of la casa let me host a belated birthday party at the house. the party featured homemade ice cream and an outdoor movie, projected on the side of the barn.
john e, kannan, and mac brought an old-fashioned hand-crank ice maker. everyone got to contribute a little bit to making the ice cream:

we made earl grey ice cream, honey ice cream, chocolate-rum-raspberry ice cream, and avocado ice cream. nora’s boys brought sprinkles and ate a few bowls of mostly sprinkles with some avocado ice cream on top:

you can find the recipe for the earl grey ice cream here. *NOTE: i always cut the recipe in thirds. using 24 egg yolks for one recipe is just insanity.
We also stapled butcher paper to the barn and projected the egyptian movie ‘the band’s visit’, a very slow-paced comedy that i would highly recommend.

We recently had a house guest, Aaron, who works for the Chicago Park District maintaining parks and natural areas. He walked around the yard identifying everything he could. There were several prairie species, and lots of invasive weeds. We learned that the big pink flowers that the carpenter bees love is called Joe Pie Weed.

We also found the beautiful orange flowers of butterfly milkweed.

There were a couple plants the Aaron couldn’t recognize. I found the flickr photo pool called ID Please, where you upload photos of plants and animals you can’t identify and the people who troll that group ID them for you. I was able to identify this mallow plant and some comfrey that way.
Scroll through the slideshow to see some of the identified species.
Vodpod videos no longer available.
Robby-Bob and I went to another bee club meeting on Sunday. It was a special event for the club. An expert was there to discuss and demonstrate ways to test bees for hygienic behavior.

The reason this is important is because beekeepers routinely use chemicals to fight off infections and pests, usually to save themselves from economic ruin. To reduce the amount of chemicals beekeepers use, an effort is underway to selectively breed bees that resist the pests. One way for bees to protect themselves is to identify and remove cells in the hive that are infected. Bees that demonstrate hygienic behavior are those that remove larvae from damaged cells. To test for this trait, they selectively freeze/kill a section of larvae with liquid nitrogen and watch to see if the dead larvae are removed by the workers.

A steel can is smushed into the comb, and liquid nitrogen is poured inside to instantly kill the larvae inside. After 24 hours, the frames are inspected.


The frame on the LEFT is from a hive that does NOT show hygienic behavior. In the frame on the RIGHT, notice how the bees removed the larvae from all the cells leaving a circle of empty comb, a sign of hygienic behavior.
Many people have heard of Colony Collapse Disorder, but bees are susceptible to a range of problems and so most beekeepers rely on some sort of chemical strategy to maintain their business. Breeding hygienic bees may ultimately lead to an industry less dependent on chemical inputs, meaning more ‘natural’, or ‘organic’ honey and wax (yay!). Of course I am oversimplifying this whole process. Hygienic behavior is actually much more complicated, especially when you approach it from the genetic side.
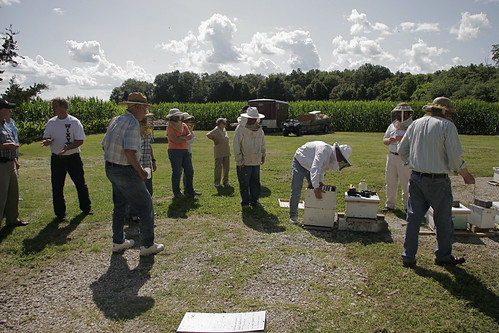
I was very lucky to be invited to the club meeting and demonstration, thanks Robby!
I posted more photos of the meeting to this flickr set.
Also CEIBA wrote about the event (and used my photos!) on their website.
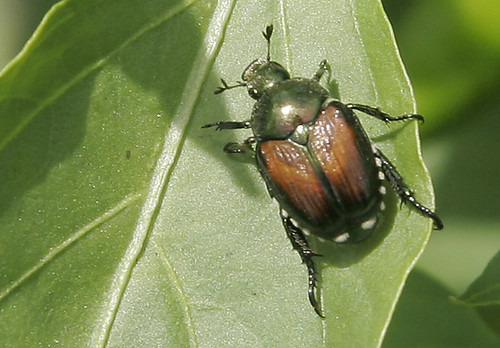
These beetles did a serious number on our red raspberries this season.
Found some lemon cukes ready to pick, yum.

More super happy sunflowers.

A cabbage from a mac, john e, and kannan’s plot.

Leaf bug laying eggs on the barn. (photo by mac)

I went on a class trip to East St Louis this weekend, and lo and behold, we visited a dome.
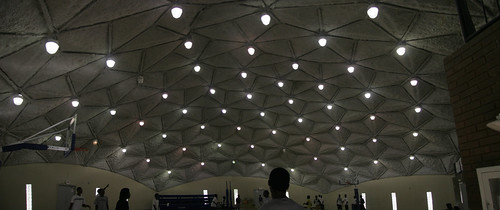
The Dome housed the gym of the Mary Brown Community Center, which was a big stop on our two day tour of the different community centers, libraries, and churches where community engagement is taking place. I was very much in awe of this dome (which didn’t seem geodesic since there weren’t just triangles, but I could be wrong). I made the spliced panorama above (hastily) while two games of pickup basketball were being played.
As a blogged about before, Domes are notorious for being difficult to maintain. I was curious about this beautiful structure so I decided to cast a net (aka Google Search) and see what info about the Mary Brown CC was out on the web.

I tried a few different search strings and eventually came across the Search Timeline for “mary brown community center”. The Timeline feature is cool, but its utility is limited. As you can see, the search results only go back as far as 1988, when Jackie Joyner Kersey began getting press about her desire to rehab the Community Center where she first began running track. The timeline displays results from the Google News database, which seems to have a limited scope. I’m sure if I went and did a similar search through old microfilm and other non-digital archives, I would come up with a much broader picture of the history of the Community Center and the Dome. Of course, I would probably never actually do that, and I was able to learn much about the Center by rifling through the results. I couldn’t find the year the Dome was built but I did learn that the Dome was rehabbed in 2004 after years of delays (and a scandal?). One thing I don’t like about this Timeline feature is that many of the News stories need to be purchased in order to view the fulltext, boo. I guess newspapers need to make money somehow.
Ed, a local beekeeper, came to check out our hives for a three week checkup last weekend. Robby is out of town, so he arranged to have some members of CEIBA help keep an eye on the hives. We had gotten a late start with our bees but each queen came with 5 frames of brood and honey. In just a few weeks, the bees have really established themselves and Ed determined it was time to add the second box on the hive. This will give each hive 10 fresh frames to build comb and expand the colony size.

This frame is full of capped brood. Brood is the general name for combs that have eggs and larvae. The worker bees feed the developing larvae before sealing them in with a cap . In a few weeks these bees will hatch and the process will start over again with the queen coming around and laying eggs in each comb. In this way, the colony will double and triple in size very rapidly.

In the center of this photo, a bee is hatching from the comb. We watched as the bee ate away the cap. Like eating corn on the cob, she went back and forth chewing her way out. After she leaves, the workers will clean out the comb and get it ready for another egg.

This is what the comb looks like when the bees decide to store honey instead of brood. This looks like it was a fresh frame to begin with since you can still see in the lower left that the comb hasn’t been fully drawn out by the bees. There must be a lot of nectar flowing now because even though the comb isn’t finished, the bees are already storing and capping honey. In the upper right is capped honey. To process the honey, the bees sit over the comb and fan their wings to evaporate off the water. Once the honey is sufficiently concentrated they seal the comb off. You can tell the difference between capped honey and capped brood by the color.
I took lots of photos so we could inspect the bees in depth without keeping the hive open for too long. Click the thumbnails to go to a flickr set of the event.


